
As a marketing manager, you work hard to smooth out the edges in your organization’s processes. Part of that work is having an efficient way for people to submit marketing requests.
Right now, your inbox is overflowing, there’s no good way to manage the process, and there is a constant fear that things are getting missed.
Luckily, CoSchedule Marketing Suite has tools & processes to help you triage incoming requests like a pro.
Don’t have Marketing Suite? Find out how to use request forms in Marketing Calendar.
[table of contents]
When you use Request Forms in Marketing Suite, you can:
- Formalize your project intake request process by creating custom request forms.
- Build forms for specific teams, projects, & purposes to collect necessary project details upfront.
- Easily prioritize incoming requests using Request Forms + Idea Board.
- Stay notified when new requests come in.
- Track the progress of new marketing campaigns & projects.
- Put requests into action with one click.
Imagine never having to worry about missing requests that are stuck in your inbox! Simply follow the step-by-step process in this blog post to make it happen.
This post will show you exactly how to triage requests using Request Forms + Idea Board in Marketing Suite.
Ready to implement your own marketing request form?
Regardless of what you’re using the form for, it’s relatively quick and easy to set up a marketing request form for your internal team to use.
There are four steps you can follow to build your request form system successfully.
- Create Your Marketing Request Form
- Set Up A New Requests Idea Board
- Share The Link To Start Receiving Requests
- Prioritize And Organize Requests
Step 1: Create Your Request Form With Marketing Suite
Create a Request Form
The first step in creating a request form is locating the Request Form tab in your Calendar Settings. Here, you can see all your request forms and edit or remove them.
To create a new request form, click on “Create Request Form.”
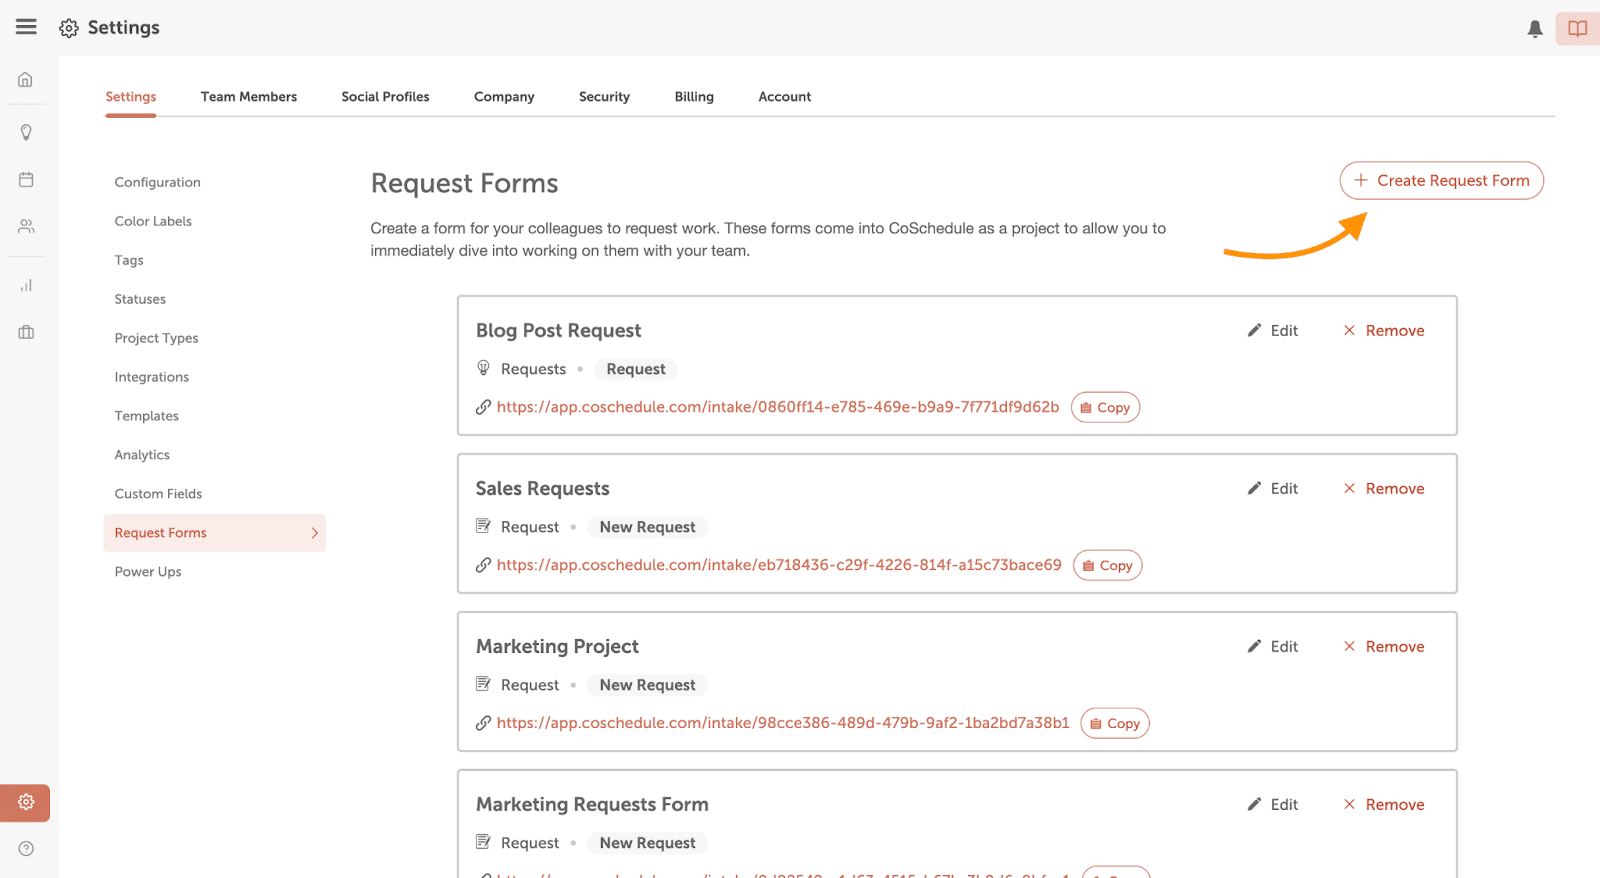
From here, you can fill out all necessary information, such as title, project template, project type, initial status, label, and assign the owner of the form.
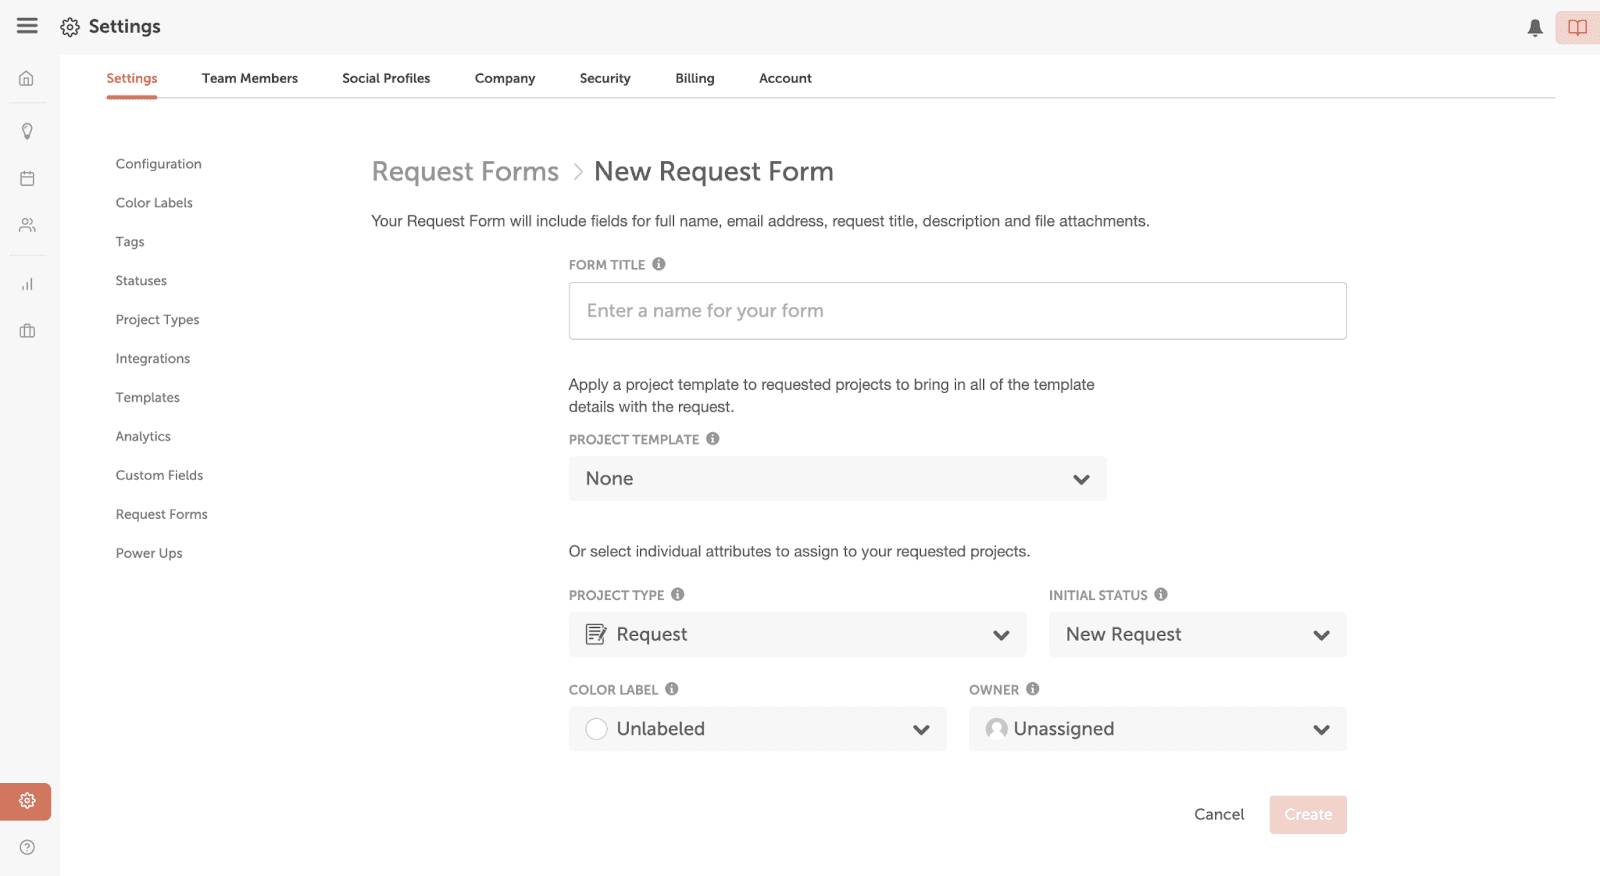
Customize Your Request Form
Once you press create, you can customize your request form. This is where you can narrow down or broaden your request form to make sure requesters fill out all the necessary information you need for new projects.
Choose which fields you want to include and the project your form creates. Make sure to check the box “Require Field” if you want that information filled out on every form.
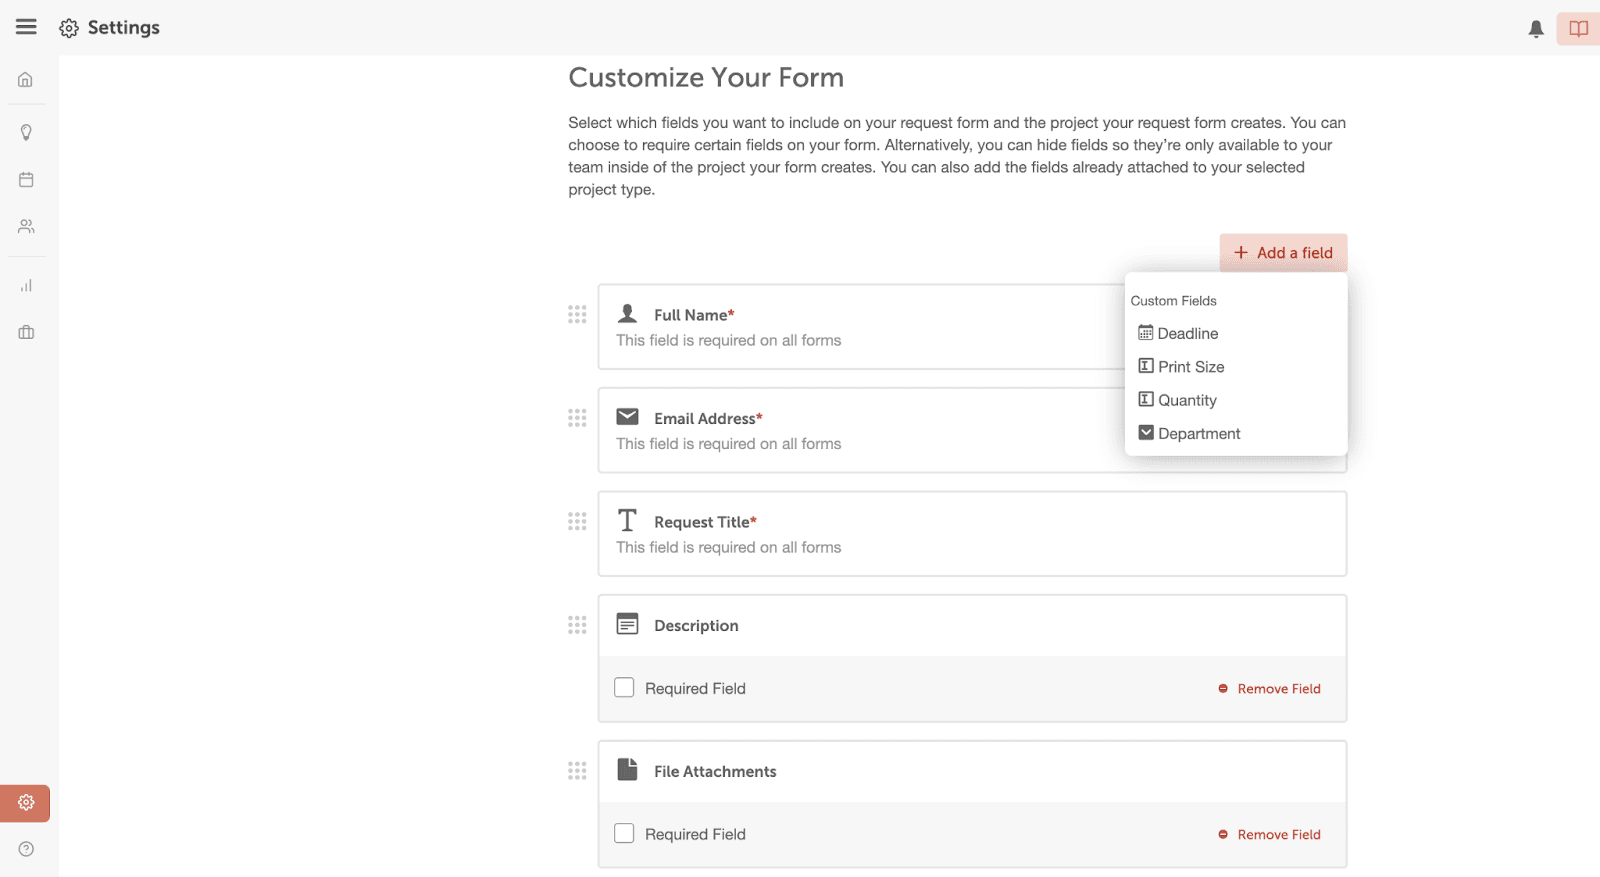
When customizing your form, you can add any of the custom fields that have been previously created. Learn how to create a custom field here.
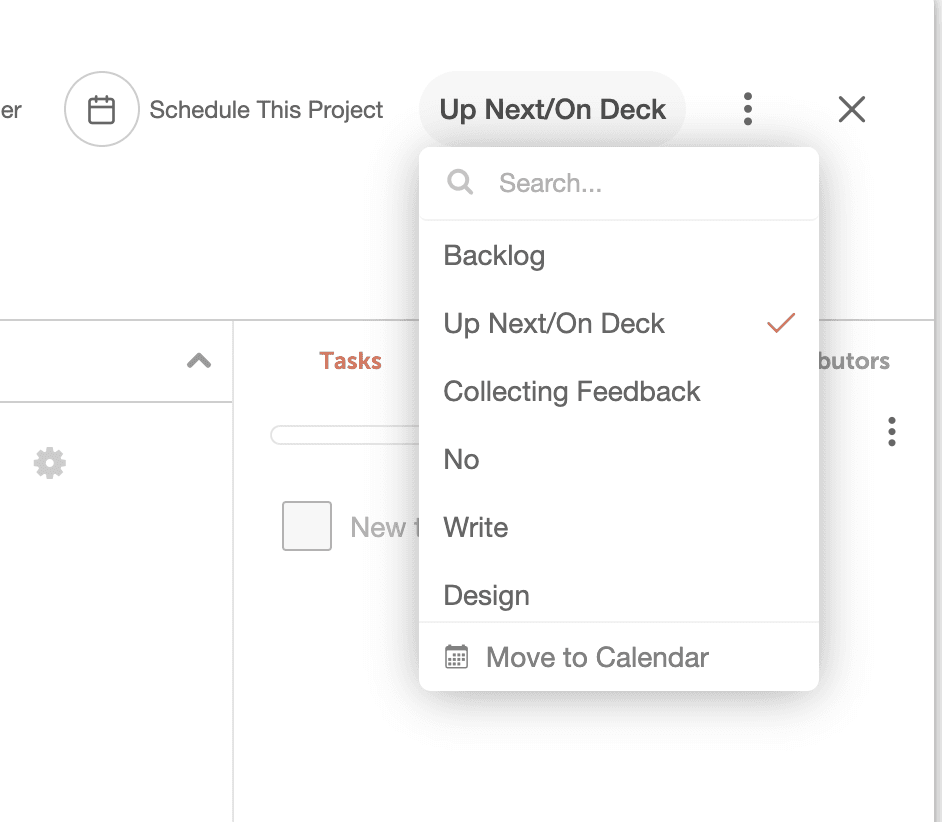
Step 2: Set Up A New Requests Idea Board
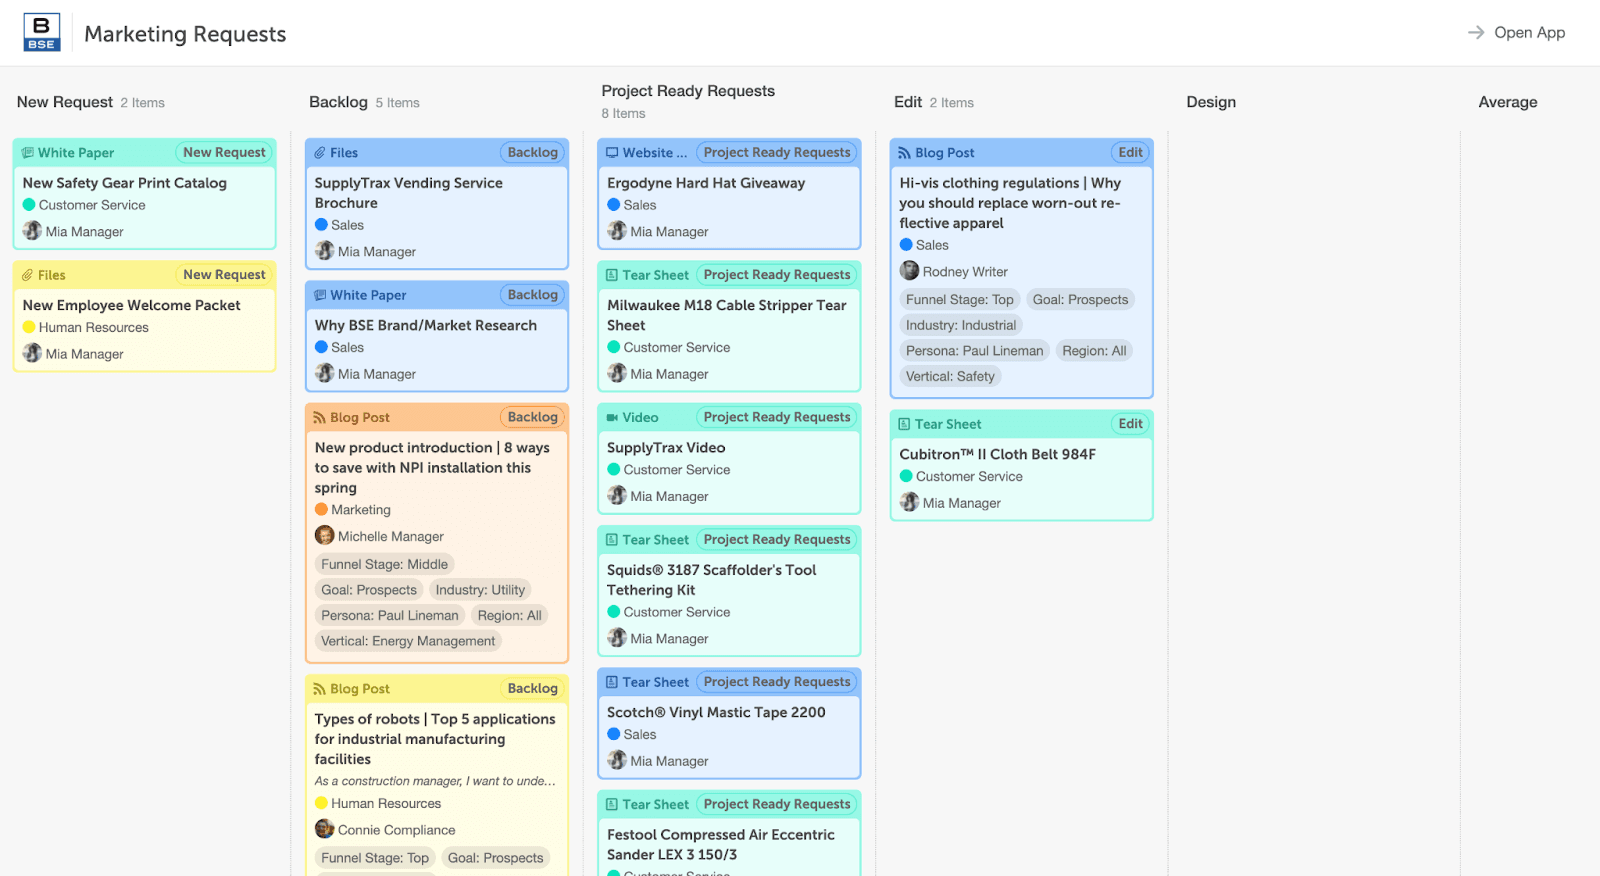
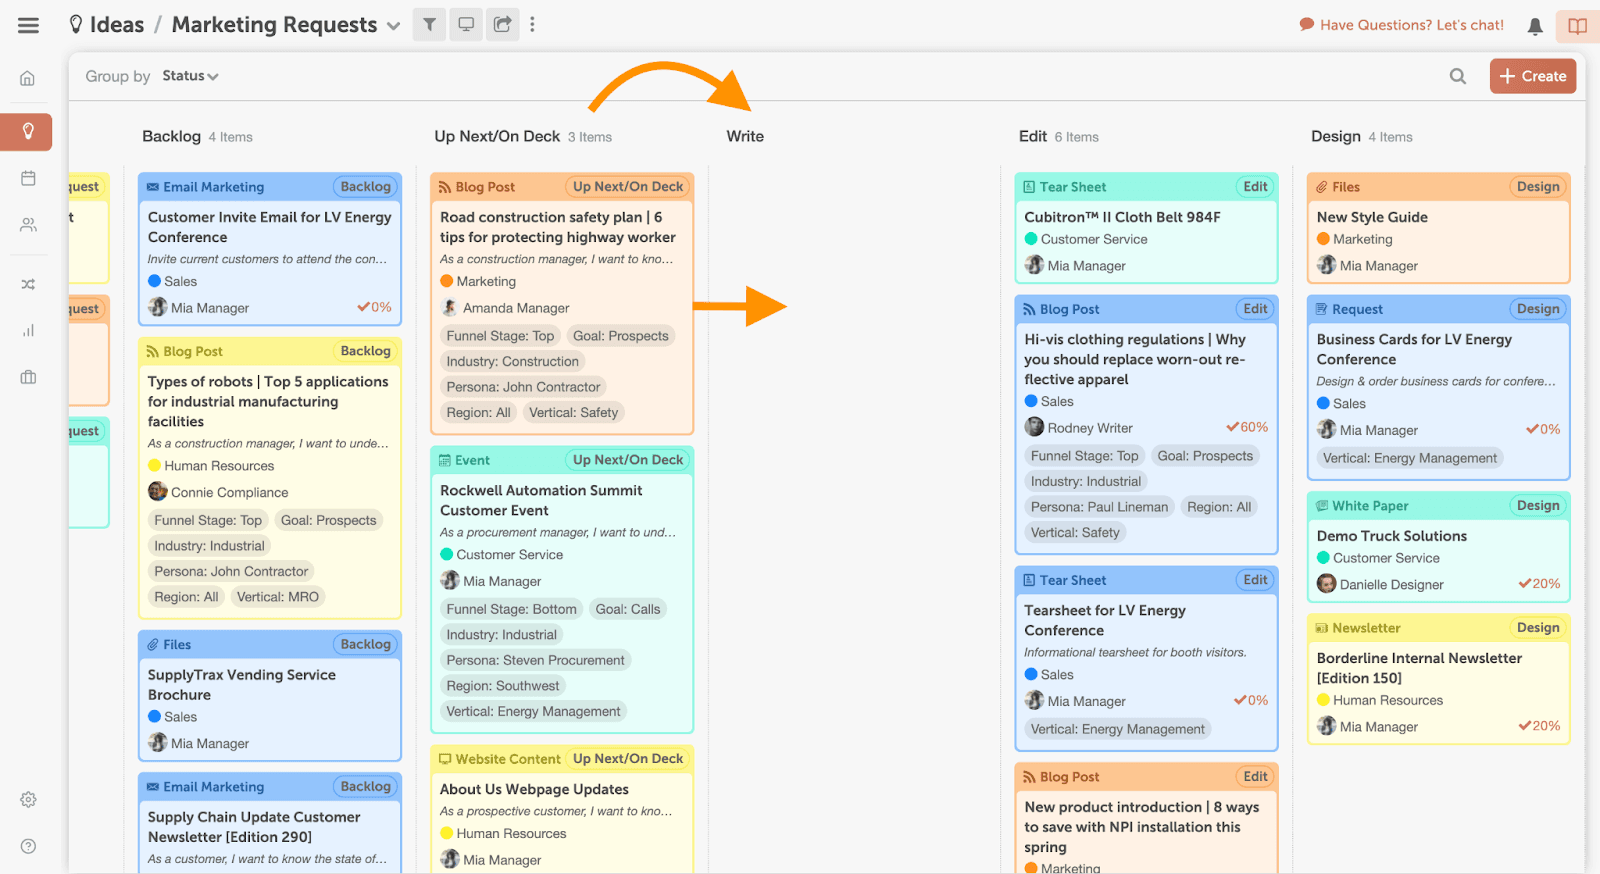
Now that you’ve created your request form, it’s time to create a custom workflow within your Idea Board. This is where all requests will be organized based on status.
The best way to do this is to set up a Saved View in your Idea Board where the status of each request is listed. Include the statuses you want and arrange them in a way that makes sense for your workflow. Learn how to create a status.
The picture below gives an example of what your custom workflow for Request Forms could look like in the Idea Board.
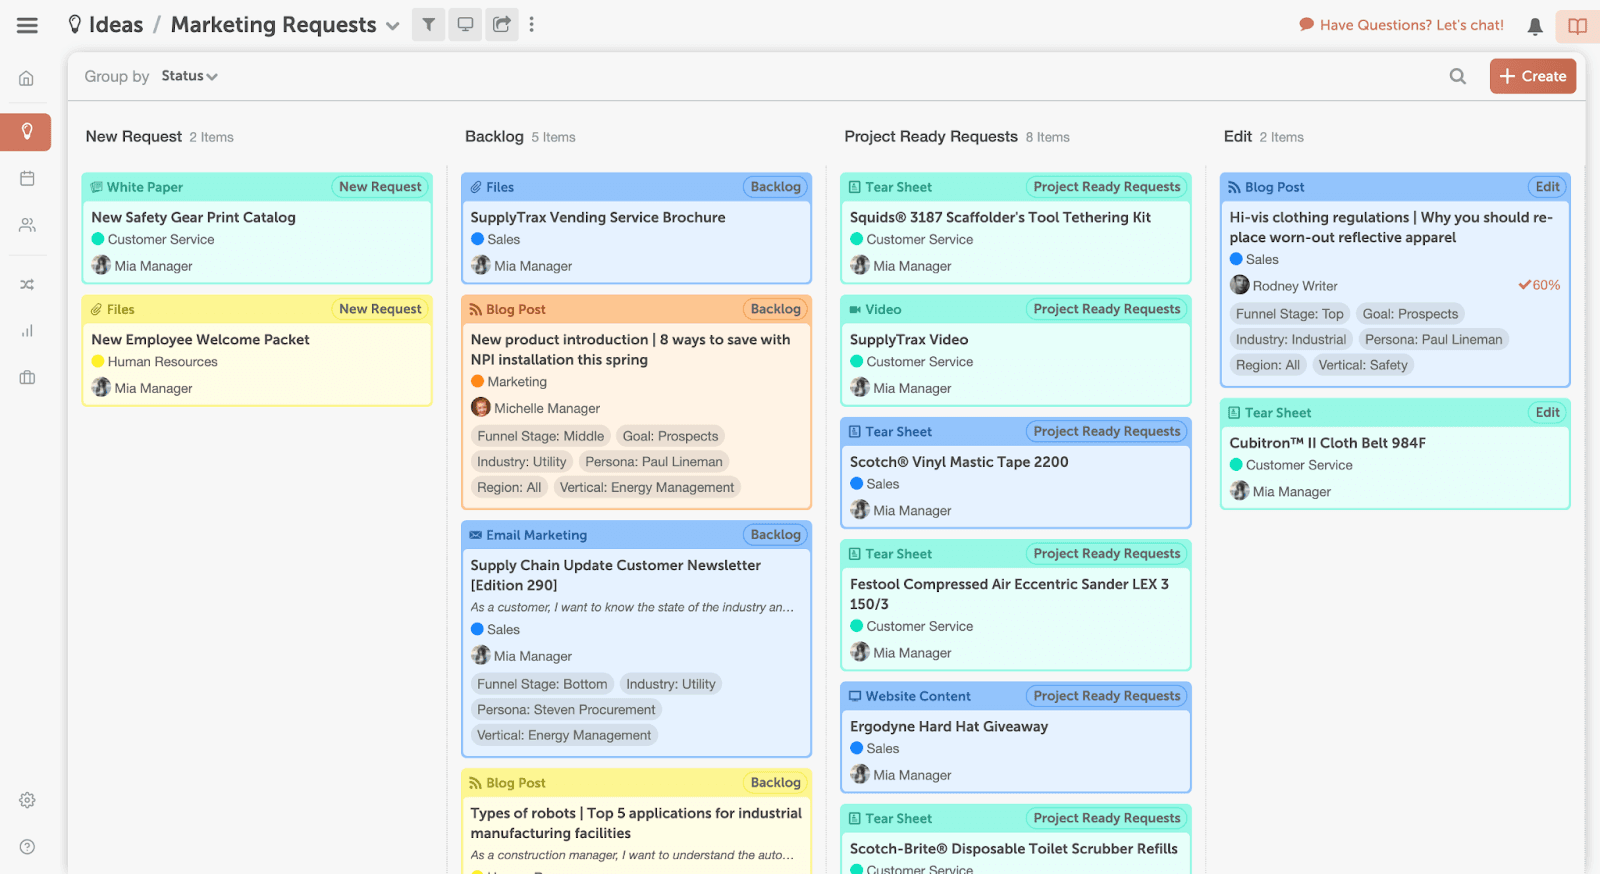
Now Request Forms that your team submits will appear under the status, “New Requests.” From there, you can prioritize them & move them to their “next step” status to move work forward.
Having a complete understanding of where you’re at with each request will allow you to prioritize which ones need to be worked on next.
Learn more about managing the Idea Board by checking out our support doc.
Step 3: Share The Link With Your Organization To Submit Requests
Before receiving requests, you must share the Request Form link with any individuals or teams requesting marketing projects.
We recommend sending out an email. In the message, be straightforward in your communication and tell them why this change is being made to the project request process, how to use the request form, and the appropriate times to use it.
Here’s an example email you can steal to save time:
Hi everyone,
It’s getting increasingly difficult to track incoming requests for marketing materials. In the interest of saving time and avoiding things getting lost in the shuffle, we will be implementing a new request form.
Please fill this out whenever you require something from the marketing team. I recommend bookmarking the link for quick and easy access. Once you submit a request using the form, I will send you a confirmation and expected timeline for delivery. INSERT THE LINK
Thanks for your cooperation.
YOUR NAME
We recommend bookmarking the link yourself for quick access when people inevitably forget to use it. You can simply respond by sending them the link again until they get the hang of the new process.
Share A Read-Only Link To Track Request Progress
Have any requesters that constantly ask, “When will my project be done?”
With Marketing Suite, you can create a read-only view of your Idea Board to keep these people informed about what stage their request is at in the creative process.
To create a read-only view, click “Share Calendar” and select your marketing request view.
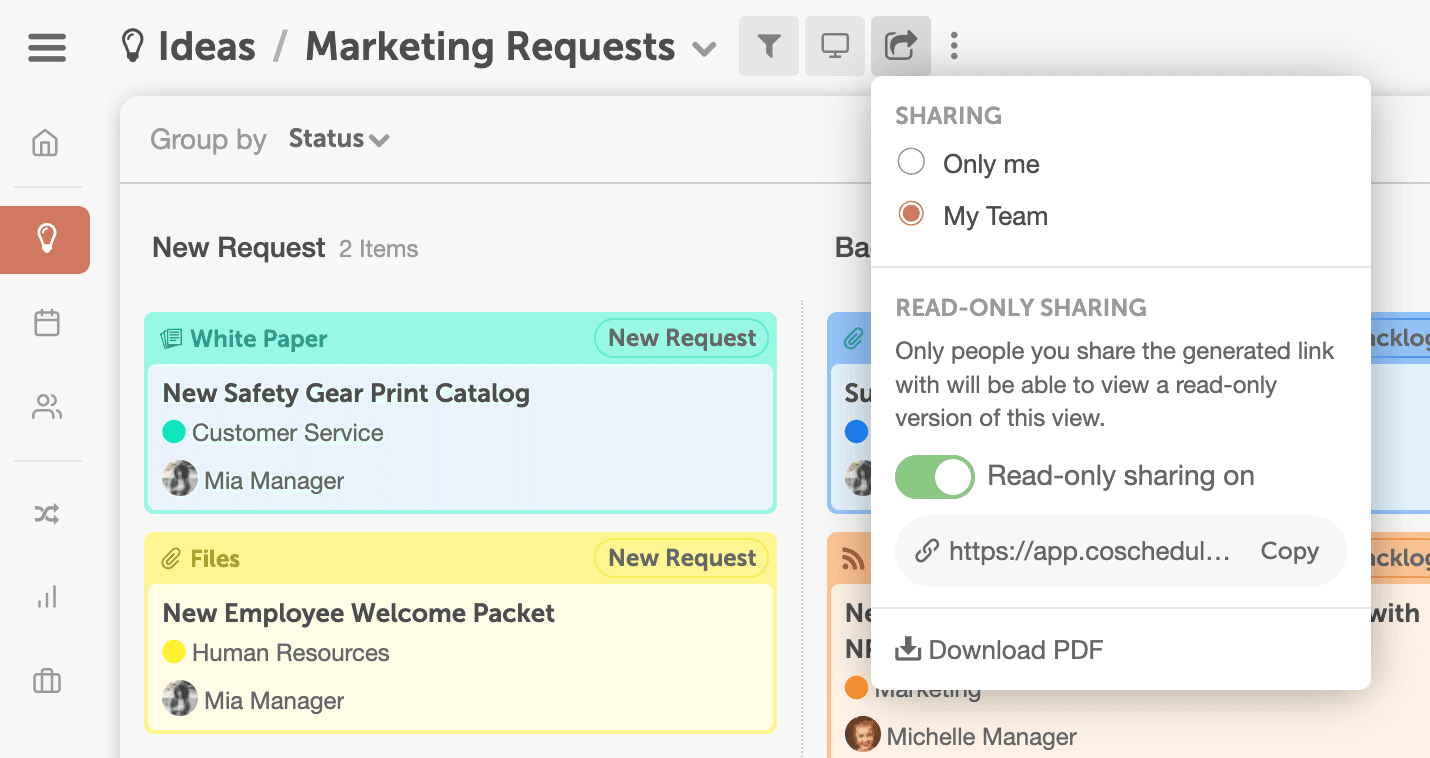
This is how a read-only link looks to stakeholders.
You can choose to download the saved view as a PDF rather than using a read-only link.
If you receive many requests across the company, you can create Saved Views for each specific team to give them a clear view of what marketing is working on for their department.
Step 4: Prioritize Incoming Project Requests
Congrats! You have a beautifully crafted system where team members can submit form requests. To get the most out of your new system, make sure you are checking the requests and taking action in a timely manner.
Monitor and Organize Incoming Requests
Form submissions will begin trickling in, which means your team is submitting requests that need your attention.
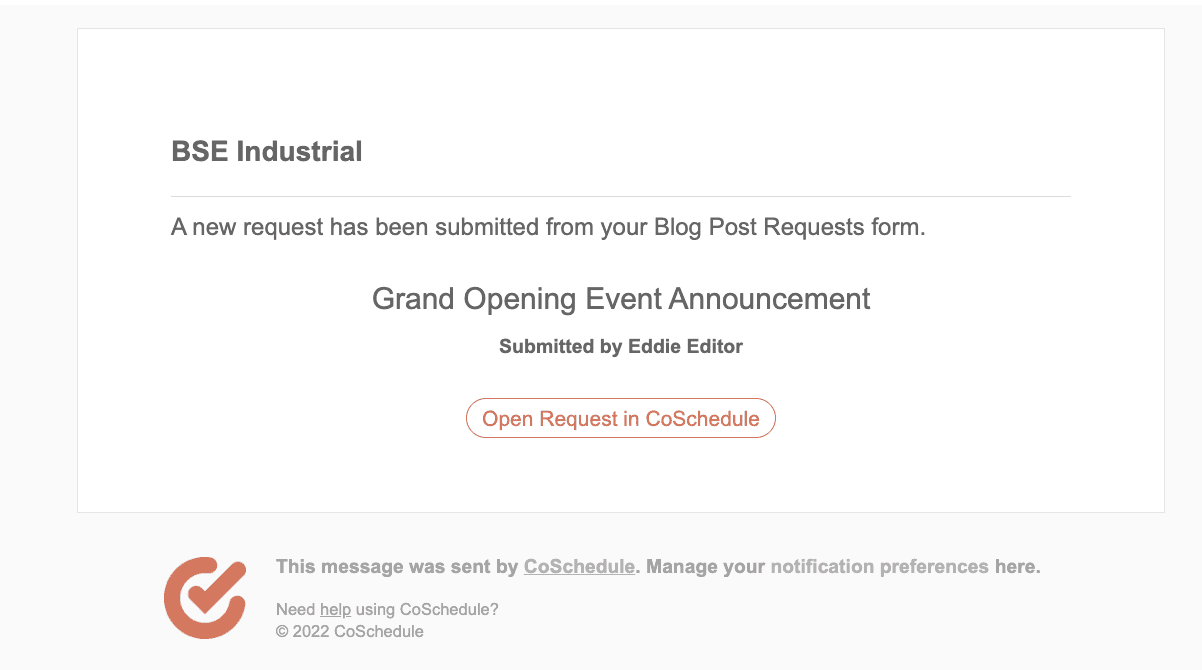
As these requests come in, you will get notifications through your email and your CoSchedule App.
When a request is submitted, you can find it in the “New Requests” column you created in Step 2. From there, you can prioritize and organize them directly through the Idea Board.
After seeing the incoming request, you’ll need to decide how this project will fit into your team’s schedule.
If it is something you won’t prioritize immediately, move it to the Backlog Status.
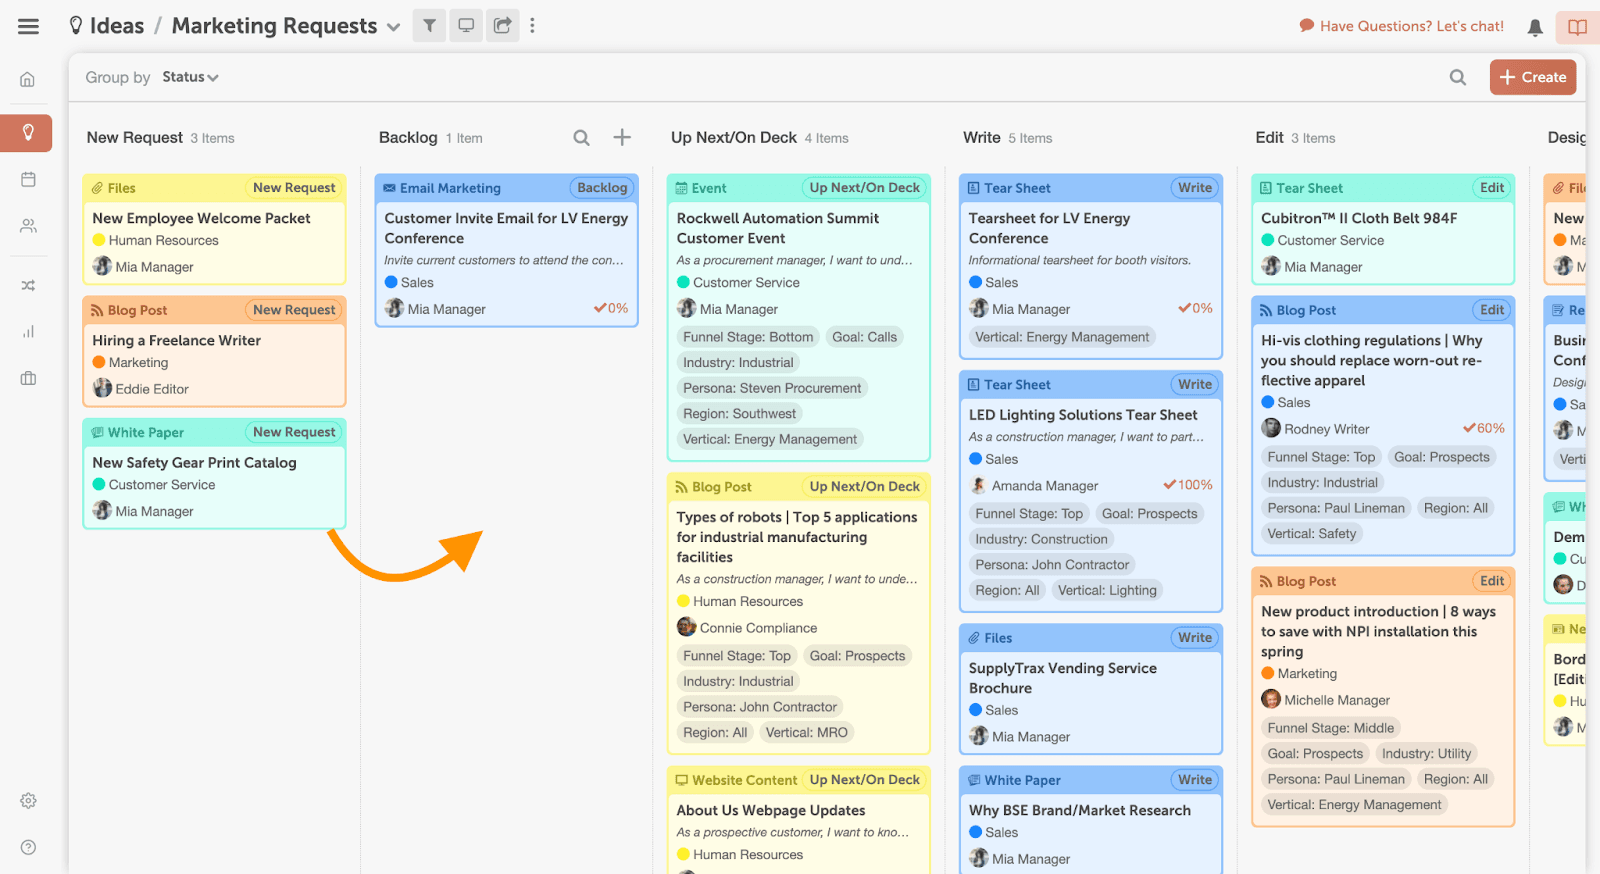
This serves as a visual reminder that you know the request has been submitted but aren’t ready to prioritize it.
Once you’ve decided to approve the request & start work, move it into production by changing the status & assigning tasks to your team.
Analyze Requests and Take Action
Spend some time looking at your team’s requests and decide your next plan of action.
That might include:
- Scheduling a meeting with the person who submitted the idea to discuss it in detail
- Approving their request and giving them the go-ahead for a new project
- Passing the request to someone better placed to handle it
For more information on using marketing request forms in Marketing Suite, visit our support doc.
Learn more about marketing request forms in general by visiting: Marketing Request Forms: How to Create One Your Team Will Actually Use
This blog post was originally published in October of 2019. It was updated and republished in January of 2020 and again in May 2023.