Disclosure: This content is reader-supported, which means if you click on some of our links that we may earn a commission.
WordPress has officially passed the 39% mark and powers over one-third of the entire web.
It’s like the Oprah Winfrey of the web hosting world—reliable, has a loyal user base, an excellent reputation, and is super popular worldwide. Therefore, it makes perfect sense to build a website on WordPress.
Creating a website may seem scary if you aren’t a “techie“ type of person, but trust me when I tell you that times have changed. It’s now faster, cheaper, and easier than ever.
In this guide, I’ll tell you how to build a WordPress site in under 60 minutes.
Ready?
Your Two-Minute Cheat Sheet
Don’t have enough time to go through the whole article? Here’s your quick cheat sheet.
Disclaimer: This is just the gist of the whole shebang. So, don’t go looking for too many details here. Those are further below.
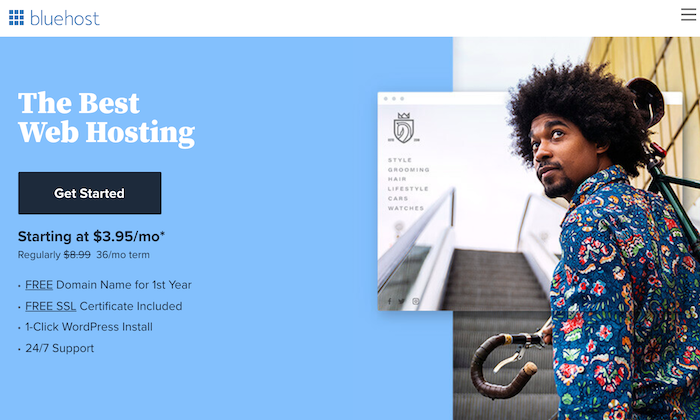
While you have several web hosting provider options available, I recommend starting your WordPress website journey with Bluehost. It’s super dependable, offers fast loading times, and is good for your budget.
The first step is to set up your account with Bluehost. The whole thing is pretty simple and only involves choosing a subscription plan, registering your domain name, and finalizing the deal. That’s it!
Next, you have to install WordPress (Bluehost does it for you) and familiarize yourself with its UI. Then you’ll have to pick a theme for your website that suits your brand best and also makes things functional. My favorite is ThemeForest, but you can also stick to WordPress’s official directory.
Make sure you set your permalink structure to make your links more readable and optimized for the SERPs. This is super important, so please don’t skip it. You can also install plugins to extend your website’s abilities, but it’s strictly optional.
Finally, all that’s left to do is create fantastic content that makes visitors flock to your website.
Voila! You now have a WordPress website that looks beautiful, has amazing content, and is ready to handle the traffic.
Let’s now see how the whole thing works in more detail.
Step 1: Choose a Domain Name
Your domain name is your identity on the internet. It’s how your audience will find you and identify your brand. Precisely why you should choose something that reflects your brand and is easier for people to type into their browser and find you.
You have complete freedom to choose your domain name, though. You can choose any name you want—provided it is available and not registered by other companies.
Here are a few tips for selecting a great domain name for your website:
- Make it brandable and unique-sounding
- Make sure it’s memorable
- Keep it short
- Keep it easy to spell, pronounce, and type
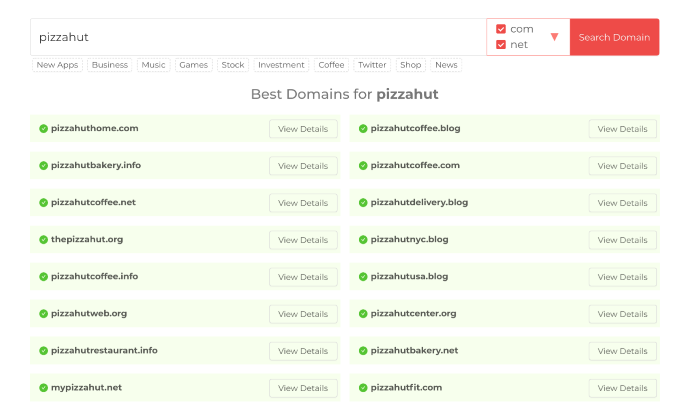
- Include niche-related words. For instance, if you plan on selling pizza, it would make sense to add pizza somewhere in the domain.
Think about it: Doesn’t www.pizzahut.com sound better than pizzasellingplace.com? Exactly.
You can use Domain Wheel, a free website name generator, to develop more ideas if you’re looking for some inspiration. Simply put in a keyword related to your niche, and the tool will give you tons of suggestions to inspire you.
Now that you have a prospective domain name, you have to check for its availability. Considering there are about 1.8 million websites online, staying original can be a little challenging, but it’s definitely worth the effort.

Since we all love free things, you can register your domain free of cost when subscribing to a web hosting service.
Speaking of domain registration…
Step 2: Choose a Web Hosting Provider and Register a Domain Name
There are hundreds of companies that sell web hosting services and tons of companies that allow you to register a new domain name. But wouldn’t it be more convenient to choose a company that offers you both services?
Case in point: Bluehost.
This web hosting provider is reliable, beginner-friendly, cheap, AND gives you a domain name for free—take it from someone who has created many websites for his clients in his career.
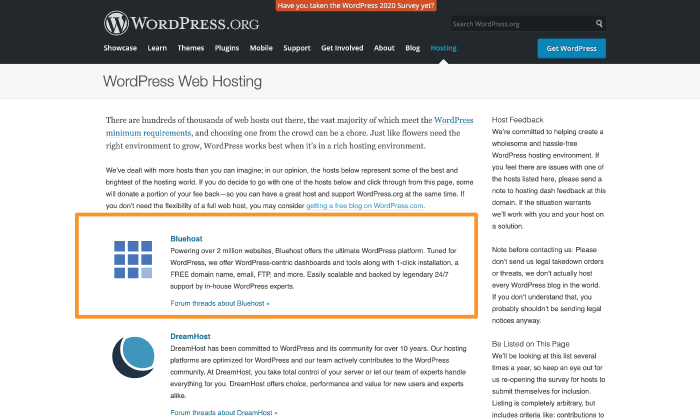
Let’s also not forget that Bluehost is one of the few companies recommended on the official WordPress.org web page.
Sold on Bluehost? Great!
Here’s how to proceed next:
Visit Bluehost’s Website
Go to Bluehost in your web browser.
Select Your Hosting Plan
You’ll see three hosting plan options displayed on your screen:
- Basic – Starting at $2.95 per month
- Plus – Starting at $4.95 per month
- Choice Plus – Starting at $5.45 per month
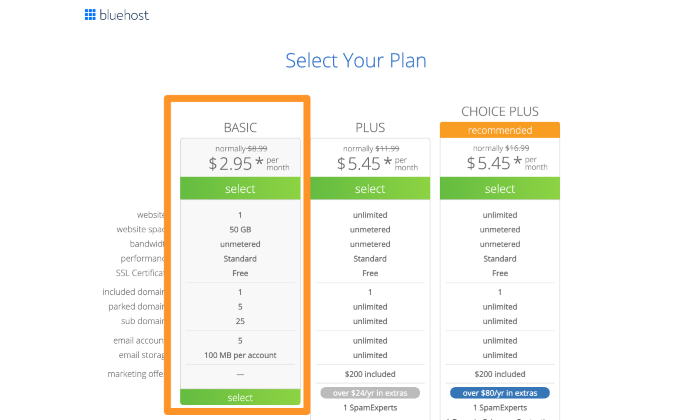
As you’re just launching your website, you can choose the cheapest plan—Basic—and get yourself a piece of the internet. Remember, you’ll get the $2.95 price tag only if you choose the three-year subscription plan.
Register Your Domain
Once you select your subscription plan, Bluehost will ask you to set up and register your domain.
You will see two options here:
- Create a new domain
- Use a domain you own
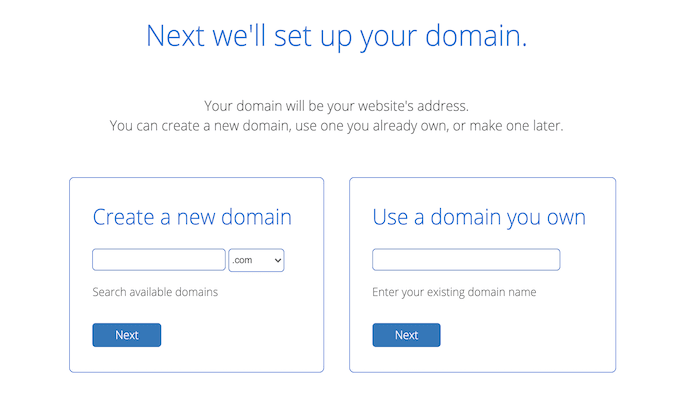
Select the Create a new domain option and enter your chosen name from Step 1. I’ll also recommend selecting a .com extension to add a more professional touch to your website.
Fill In Your Personal Information and Account Details
Next, you have to provide your personal data to set up your account.
When you scroll down, you’ll see the Package Extras section. Take care to check only those fields that you think are worthwhile for your website.
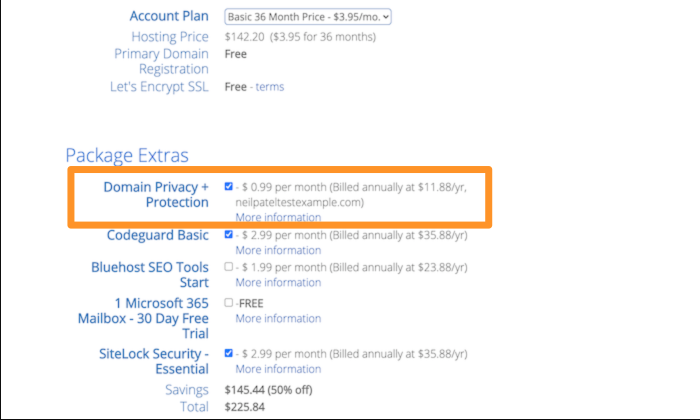
For me, selecting Domain Privacy + Protection is a must as it conceals personal information like name, email, and phone number from appearing in public databases. After all, spending a few extra cents is nothing when it comes to security.
Once you’re done, click on Submit to finalize your purchase.
Step 3: Get Bluehost to Install WordPress for You
At this point, you have a hosting service provider and a domain name. Congratulations!
The only thing missing is WordPress.
Sure, you can install WordPress manually. But why should you do it if you can get Bluehost to do it for you—for free?
After completing the signup process, check your inbox for an email from Bluehost. It‘ll contain details showing you how to log in to your customer profile and start work on your site.
Once you log in, Bluehost will show you an easy-to-use wizard that will guide you through the process of installing WordPress on your hosting set up.
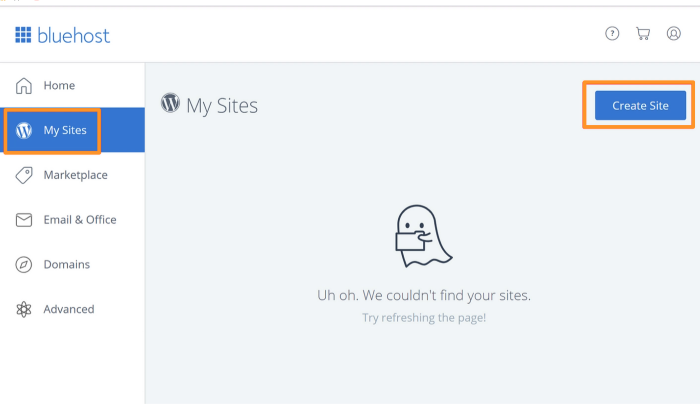
Alternative Option:
You can also install WordPress by going to the My Sites section. Click on the Create Site button, and the installation will begin automatically. Enter your new site’s name and the username/password, and your WordPress website will be ready to go.
Step 4: Choose a Theme or Design for Your Website
One of the biggest USPs of WordPress is it supports themes.
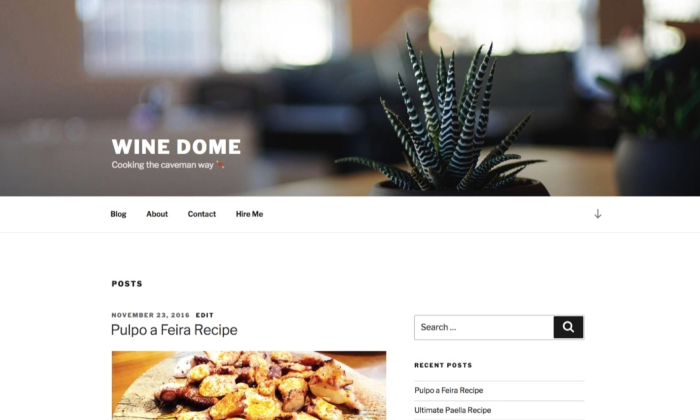
Themes are interchangeable designs that allow you to change how your WordPress website looks at the touch of a button. For example, this is what your website will look like by default:
You can change your website’s appearance by choosing another popular free theme (I chose Hestia). It’ll now look like this:
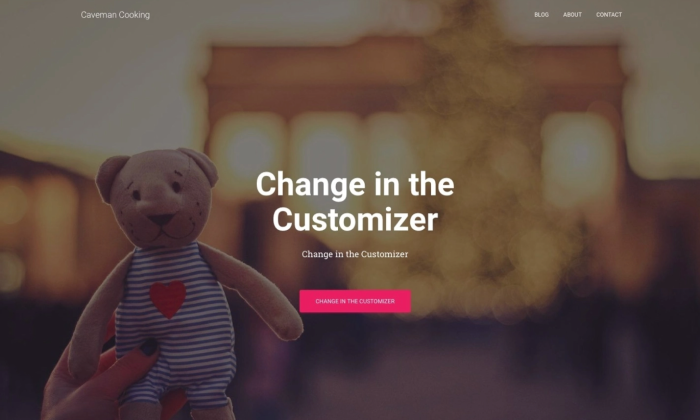
See why theme compatibility is WordPress’s biggest USP?
Choose a Theme You Like
There are hundreds—if not thousands—of WordPress themes out there.
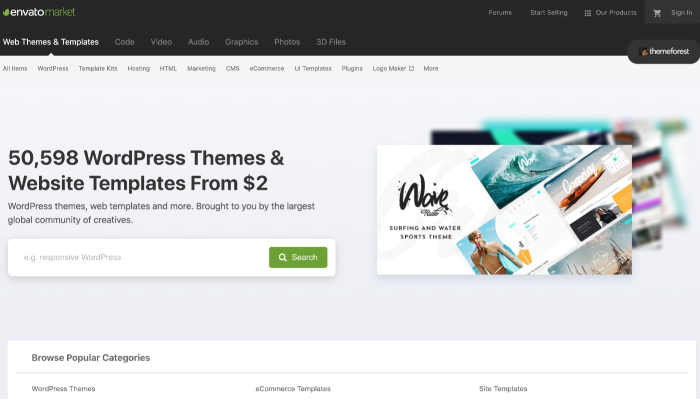
You can start by looking at the official directory at WordPress.org. But other than that, there are several other theme stores and marketplaces, such as ThemeForest. These are third-party sites that offer free and premium themes to alter the website’s presentation without changing the contents.
You can go through all the different sites and select a theme that you like best.
Install Your Chosen Theme
If you select a theme from the official directory at WordPress.org, all you have to do is hit Install right away. Here’s how to go about it:
Go to Appearance, followed by Themes, and then click on Add New. Enter the name of the theme you want to install in the search bar, and then click on the Install button under your desired theme.
After the installation, click on Activate to enable the thing on your website.
If you want to use a theme bought from a trusted third-party, the steps will differ slightly.
Here’s how you can install a premium theme on your site:
- Start by downloading the .zip file of the new theme.
- Log in to your WordPress dashboard, and go to Appearance, and then Themes.
- Click on the Add New option. You’ll then be directed to the WordPress theme dashboard.
- Select the blue button at the top of the screen that says Upload Theme. Choose the .zip file from your computer after the prompt.
You’ll see a link to activate your team after a success message. That’s it!
While some themes are free, premium themes vary in price. There are options starting at $10 and ones going all the way up to $200. You can choose an option that fits your budget and preferences best.
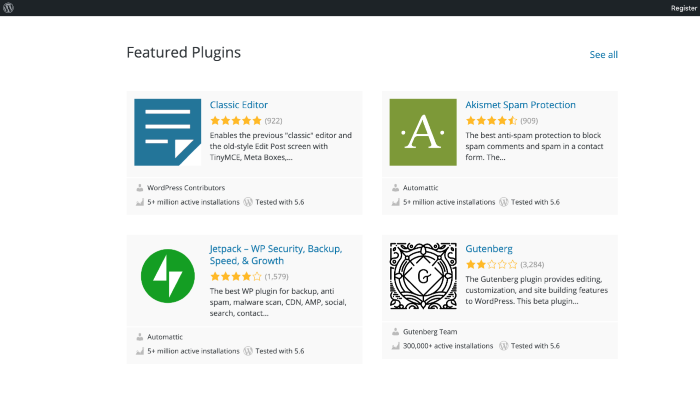
Step 5: Install Plugins (Optional)
You can consider installing plugins to boost the functionality of your website. Think of them as applications for your mobile phone.
You can refer to our best WordPress plugins guide to zero down options, but you have free reign to choose the ones that appeal to you most. From optimization to website traffic analysis to security, you’ll find tons of options for every category.
That said, don’t go overboard when installing plugins. It ends up slowing down your website, which, in turn, might result in traffic loss.
As they say, there is too much of a good thing.
Step 6: Configure Important Site Settings
Setting up permalinks is very, very important! Precisely why you should do this immediately after starting your WordPress website.
Permalink structure decides how your website links look. Think of it as a representation of your site structure. For NeilPatel.com, it looks something like this:
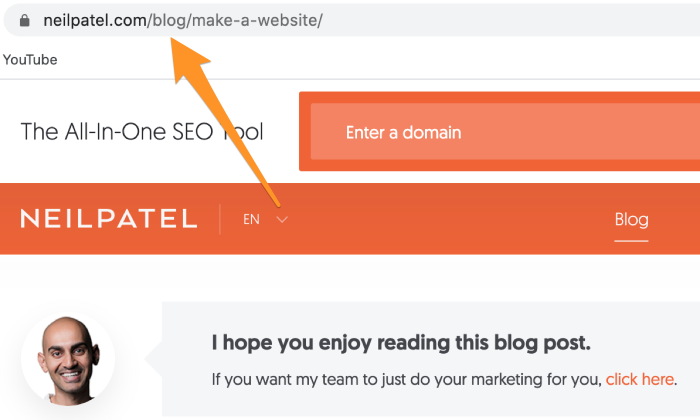
A good permalink structure tells your visitor exactly where they are on your website (in our example, they are in our blog section), while a bad structure does the opposite. Getting the permalink structure right is also crucial for boosting your SEO ranking.
There are many ways to do it wrong, which is why I’ve compiled a three-step guide to help you get it right:
- In your WordPress dashboard, click on Settings from the side menu and go to Permalinks.
- Under the Common Settings field, click on Custom Structure.
- It makes zero sense to go for Numeric as it’ll only confuse your visitor. Plus, it doesn’t serve much for SEO purposes.
- Enter the tag string “/blog/%postname%/“
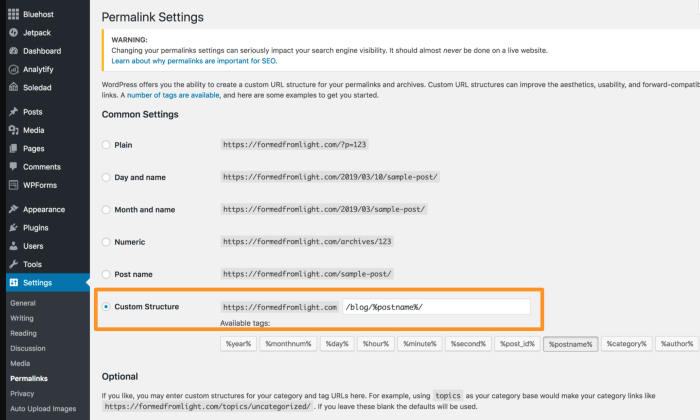
Once you’re done, click on Save to save the changes.
Step 7: Set up Important Webpages and Promote Your Site
With your website ready, you can now focus on creating high-quality content that helps you boost your traffic and conversions. Start by creating essential webpages like About, Contact Form, Privacy Policy, Portfolio, and Store (if applicable).
Want more information and a step-by-step walkthrough? Head over to my guides on how to start a blog and how to make money from blogging.
I really cannot emphasize enough the importance of having optimized content on your website that is relevant to your niche. So make sure you do thorough research to get all the nitty-gritty right.
Conclusion
That was all you needed to build a WordPress website.
At the end of it all, you’ll have a domain name, a web hosting provider, and an up and running website. Keep experimenting in your niche, and you’ll soon establish a loyal fan base that values your opinion or love your products/service.
Have you launched your website yet? Who is your all-time favorite web hosting provider, if yes?
The post How To Build a WordPress Website appeared first on Neil Patel.